Easy Custom Tufted Bed
Hello! Long time no blog!!! A few things have happened - having 2 kids being first and foremost the reason for the season (of not posting)! I'm soooo excited to share this super cute craft, because I searched far and wide and couldn't find a good how-to!!


It was an awesome, easy and fun project, I highly recommend it!!
Materials Needed
- Ikea Kura bed
- Cardboard the same size as the piece you're adding the tufting to x2 (my neighbors threw out a giant box they received a new couch in!! So fortuitous and I keep jokingly (but seriously) thanking them for their trash!!)
- Mod podge
- Cute fabric
- 2" foam
- Buttons (double the amount you'll be using to make the indents)
- Button covers (or alternatively, use the kind that have a back that you can sew - I used this kind + hot glue, but the other kind might make more sense!!)
- Hot glue (see above)
- Staple gun + staples
- Giant needle & thread (to sew through cardboard, so a thimble is pretty handy too!)
- Command strips
- Curtain rods (I used these because my kids would 100% pull down a tension rod, but I've seen it with tension rods)
- Curtains cut to length + curtain clips
How To
Start with the beds - we got 2 (!!) of these on Facebook Marketplace for less than new prices, which was pretty awesome!! Our 2 year old is upgrading to a Big Boy Bed and kept wanting to get into sister's bed, so we thought identical beds would help!! (Note: it did not help... but it's only been one night...)
We assembled this without the white pieces to make it faaancy, ooh la la, except we kept the footboard!! Why did I just do the footboard, you may ask? It's simply because I wanted to use the same fabric I had for the curtain valances and that's all I had left - otherwise, I may have done the whole dang thing!
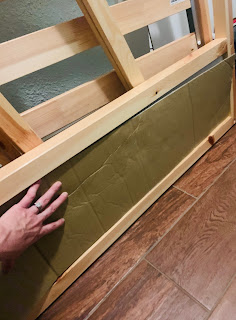
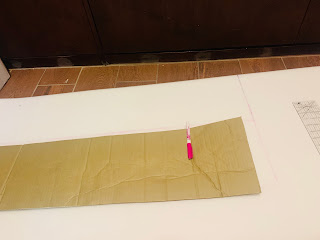
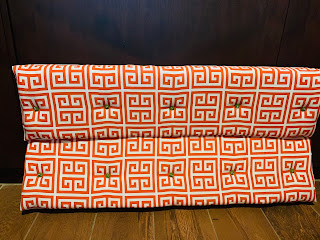
I cut out cardboard the same size as the white piece but just a smidgen smaller since it will be already assembled inside the wooden bars. Next was the foam using a serrated knife. I used Mod Podge to glue the foam to the cardboard.
Next, I wrapped the fabric tightly around the foam and stapled it to the back - note that staple guns just shoot 'em straight in, there is no curving of the staple, so the foam has to be thick enough to not get poked if you run into it! So far, so good!
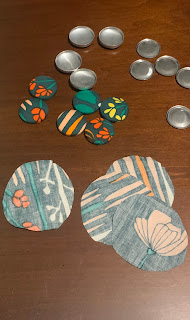
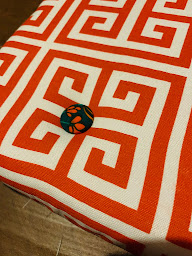
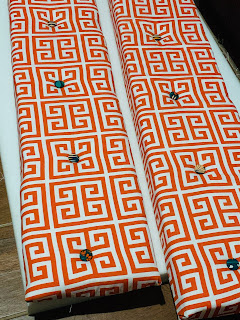
I used the BEST TOOL EVER - the button cover dealy - and made super cute buttons that would be used as covers for less-attractive buttons, and I had the BEST TIME!!
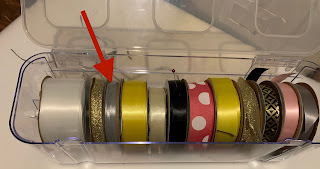
I started on the ends, then the middle, and then in between the middle and the ends to do the real buttons. Through trial and error, I figured out to use one button on the fabric side, and one on the back so the button couldn't pull through the cardboard. I also used a very thin ribbon instead of thread, because thread will (a) break, (b) break through cardboard, and (c) rip your fingers. Fun!!
Next, I hot glued the adorable covered buttons to the tops of the other buttons - this seems ok so far, but a few have fallen off, so just do with that what you will!!
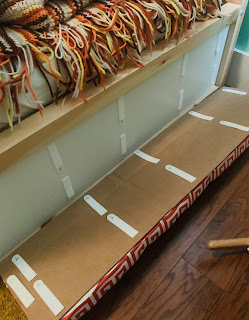
Another trial and error discovery - command strips do not stick to fabric! I cut out ANOTHER giant piece of cardboard, used more Mod Podge, and glued it to the backs of the pads. Then, just slapped a ton of command strips on there and to the bed, and voila!! It turned out SO CUTE!!!!
The finishing touch was the curtains inside for privacy - it makes it a little bit fancier, feels a teeny bit like summer camp, and the kids feel like they have this fun playful area that is Just Theirs.
 |
It was an awesome, easy and fun project, I highly recommend it!!
 |


Comments